SD-card images
Our images for the Raspberry Pi provide the easiest start into the Zigbee world and contain the pre-installed deCONZ software as well as the Phoscon App.
System requirements
- Raspberry Pi (all models, except Pico)
- ConBee, ConBee II, ConBee III, RaspBee, RaspBee II or Phoscon Gateway
- 8 GB SD-card (we recommend at least class 10)
Downloads
Installation
The following instructions are also available as a Youtube video.
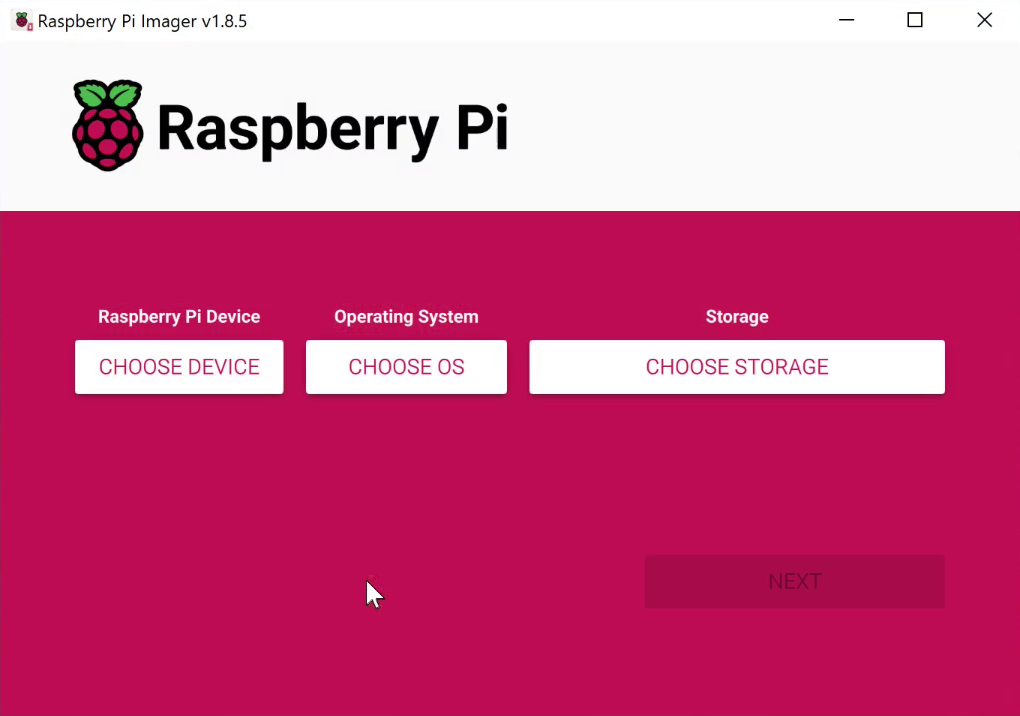
- Download and start the Raspberry Pi Imager on the website www.raspberrypi.com/software

- Insert the SD card into the PC or SD card reader
- Choose OS: Select
Use custom
- Select image: Select downloaded SD card image
- Storage: Select SD card drive
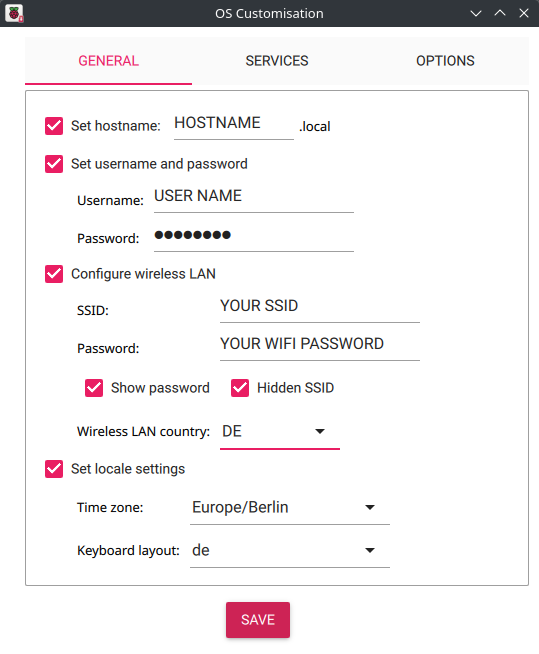
- Use OS Customisation: Click
No
if the default settings are OK, e.g. if an Ethernet cable is used. The default username and password will be used. Otherwise clickYes
to adjust the settings: hostname, username, password, WLAN, time zone and keyboard layout and presssave
.

- Write: Start copying
- Remove SD card from card slot (eject in Windows Explorer →
right-click on the drive letter and select
Eject
) - Insert micro SD card into the SD card slot of the Raspberry Pi
- Connect USB cable to the Raspberry Pi, the operating system starts automatically after about three seconds and is ready for use after about a minute
Beta channel
When switching to the beta channel of the deCONZ APT repository, the newest deCONZ beta version will be installed during update process.
sudo sh -c  "echo 'deb http://phoscon.de/apt/deconz \
            generic-beta main' > \
            /etc/apt/sources.list.d/deconz.list"
Homebridge Image
We recommend using the official Homebridge Raspbbery Pi Image for the use of deCONZ together with Homebridge.
Login via SSH
The login through SSH allows access to the Raspberry Pi via terminal. On Linux and macOS this can be done via terminal. For Windows, Putty provides the same functionality, it can be downloaded from https://putty.org.
| User | pi |
| Password | raspbeegw |
Login via VNC
The desktop based images can also be viewed without monitor, the graphical login can be done from another PC via VNC. The RealVNC Viewer is required for the VNC login. It can be downloaded from https://www.realvnc.com/download/viewer.
| User | pi |
| Password | raspbeegw |